Tutorial – Connecting the Shellfire Box to a Wifi Hotspot
In order to connect to the internet, the Shellfire Box normally requires a wired internet connection. The built-in wifi chip can then be used to connect any wireless device to the Shellfire Box.
Thanks to the large amount of feedback we received from you, we have now learned that many of you also use the Shellfire Box while travelling. So during the last months, we have been asked the question “Can I connect my Shellfire Box to a Wifi Hotspot?” many times. And guess what – the answer is YES! With just a few tricks, you will be able to connect your Shellfire Box to the internet through any wireless network. The only restriction here is, that devices can then only be connected using a network cable and not using wifi anymore, because the wireless functionality is being used to manage the internet connection.

The Shellfire Box can be connected to a wireless Wifi Hotspot
In this short tutorial, we will explain to you how to do connect your Shellfire Box to a wifi network in 10 easy steps:
Connecting the Shellfire Box to a wifi network
- Step 1
- Step 2
- Step 3
- Step 4
- Step 5
- Step 6
- Step 7
- Step 8
- Step 9
- Step 10
Connect your computer to the LAN Port (not to the WAN Port!) of the Shellfire Box and navigate to http://sf.box/ using your browser.
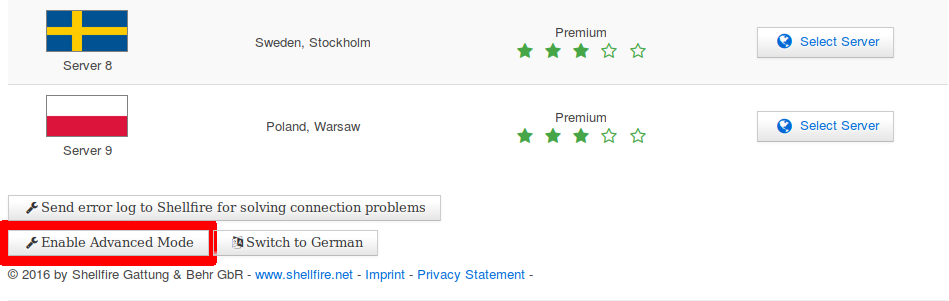
Scroll all the way down to the bottom of hte page and click Enable Advanced Mode.
Enabled Advanced Mode
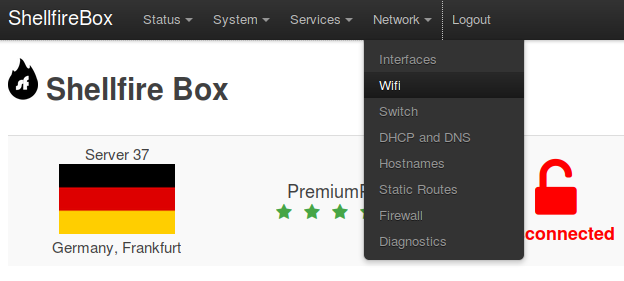
You will now see the advanced menu navigation bar at the top of the page. Click Network – Wifi.
Network Wifi
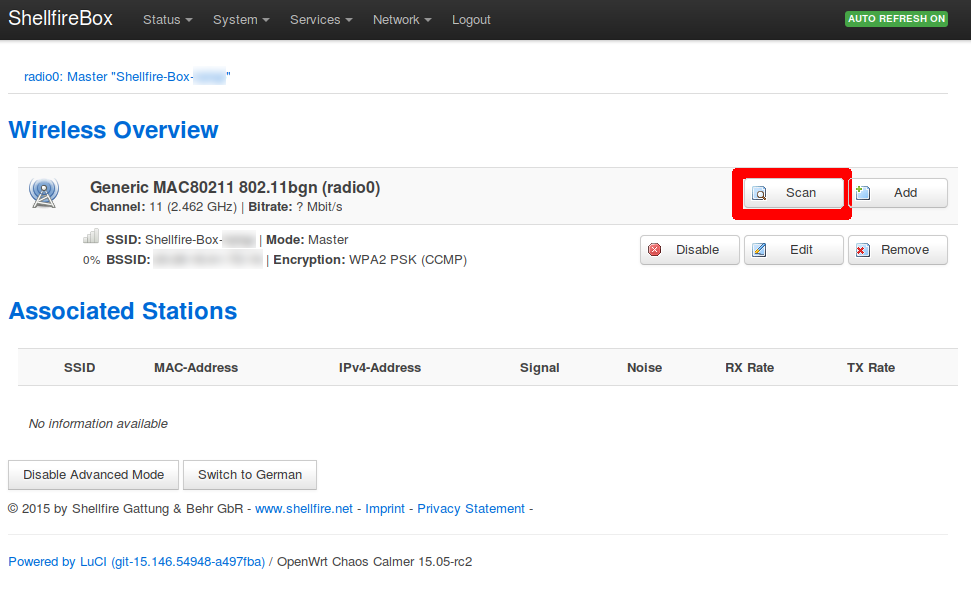
We now have to search for the Wifi network we want to connect to. Click Scan.
Shellfire Box Wifi Scan
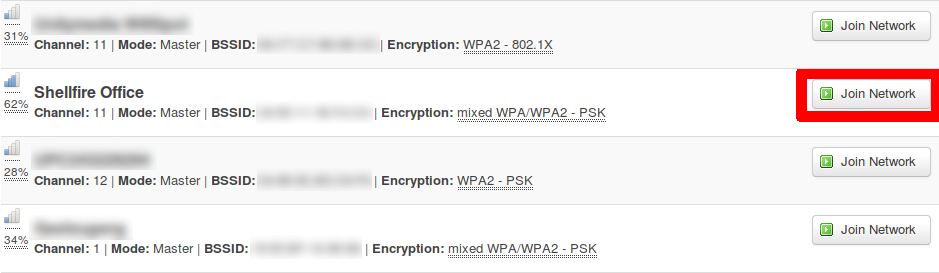
After a few seconds, you will see all available wifi networks. Select the network you want to connect to and click Join Network.
Shellfire Box Join network
It is now important that you deactivate the option called Replace wireless configuration. If your network requires a WPA key (wifi password), enter it here. Finally, click Submit.
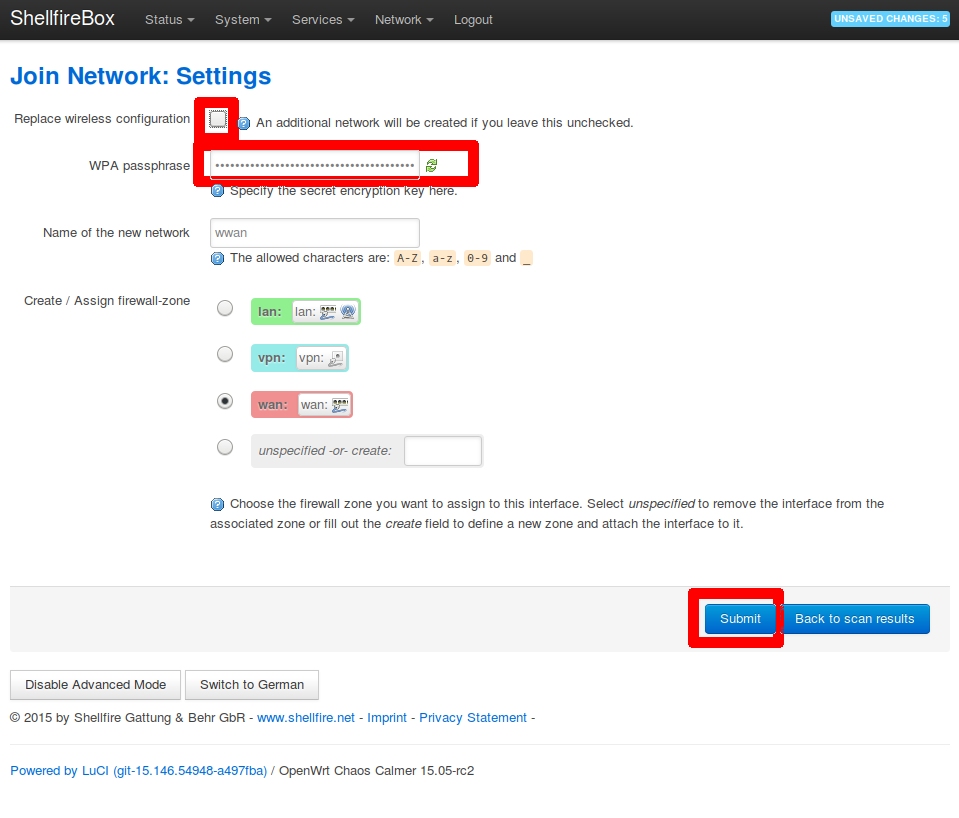
Shellfire Box join network settings
You will now see the configuation of your new device. If all settings are correct, click Save & Apply.
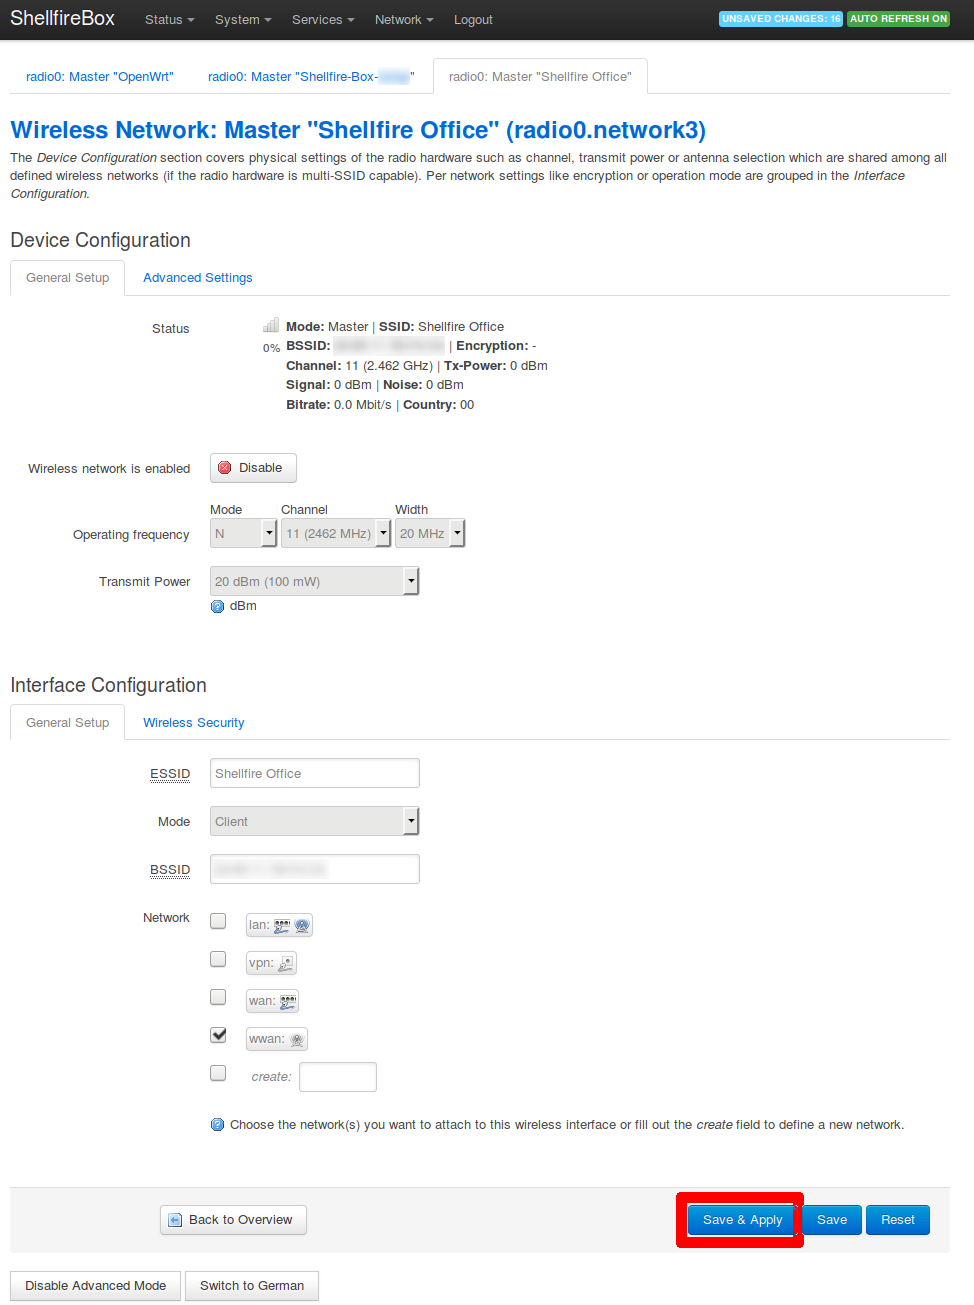
Shellfire Box device configuration
The new network will now appear in your Wifi overview. Go to Network – Interfaces.
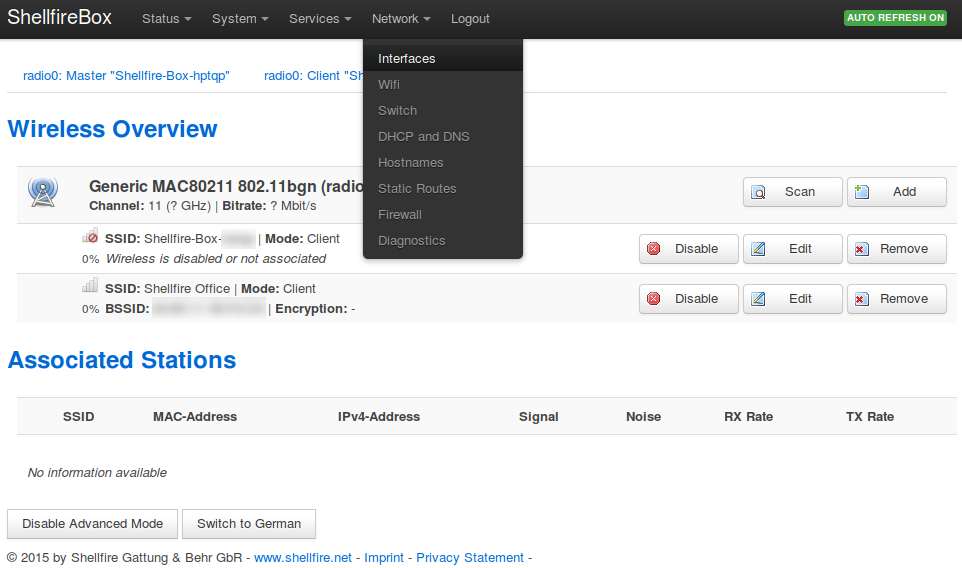
Shellfire Box wireless overview
You now see the overview of your interfaces. Click Connect next to the newly created WWAN interface. As soon as the connection process is done, click Save & Apply. You can now switch back to the Shellfire Box VPN menu under Services – Shellfire Box.

Shellfire Box interfaces
Voilà! If everything has worked, you will now be able to select a Shellfire VPN server and connect to it as usual via the Shellfire Box menu.
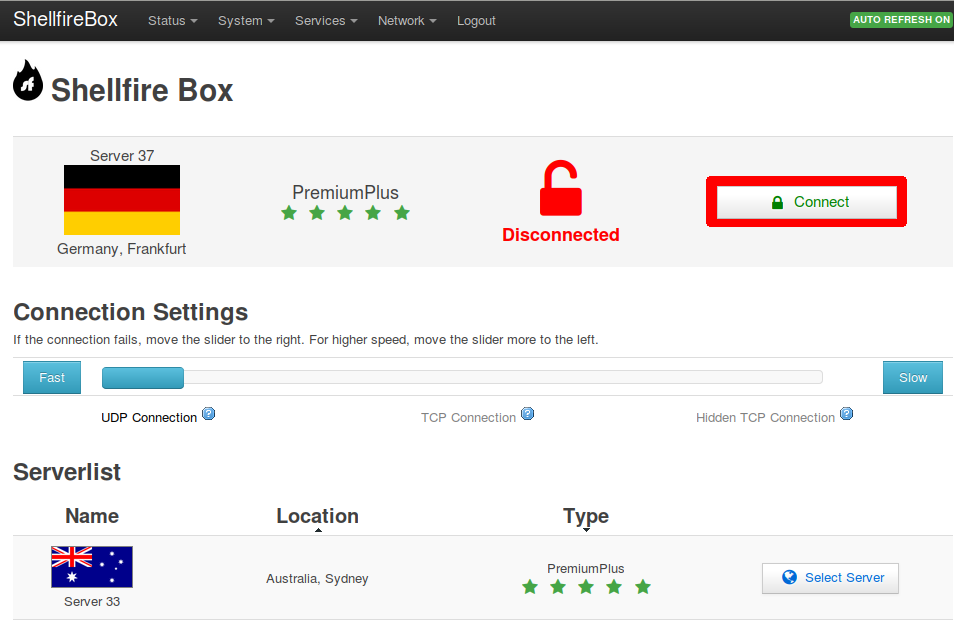
Shellfire Box disconnected

Shellfire Box connecting
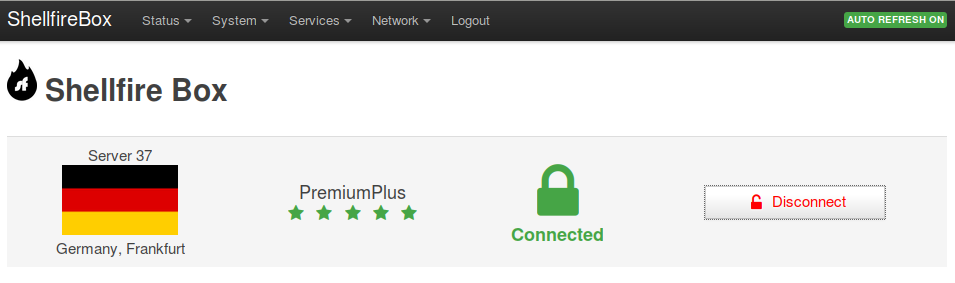
Shellfire Box connected
Did it work for you? Are there any issues? Would you like to send us some love or any feedback? No problem! Just write a comment, contact us using our live chat over at https://www.shellfire.net/vpn/ or on Facebook and Twitter!